(A) Custom Processing Rules
Configured in
Settings → Radar detector integration → Custom processing rules. TheRadar detector modelpreference underSettings → Radar detector integrationshould be set to a value other thanNo radar detector ingtegrationfor this preference to appear.
Highway Radar has quite limited settings for radar signals processing in a default fashion. However, the custom processing rules mechanism significantly expands the range of possible configurations for radar detector integration. Custom processing rules allow you to pick specific alerts and apply various modifiers to them. So, instead of having thousands of different options and scenarios embedded into Highway Radar, you can now create your own.
Custom Processing Rules Structure
Each rule has three configuration sections – basic info, conditions, and actions. Each radar/laser signal is first matched against conditions, and if there is a match, actions are applied.
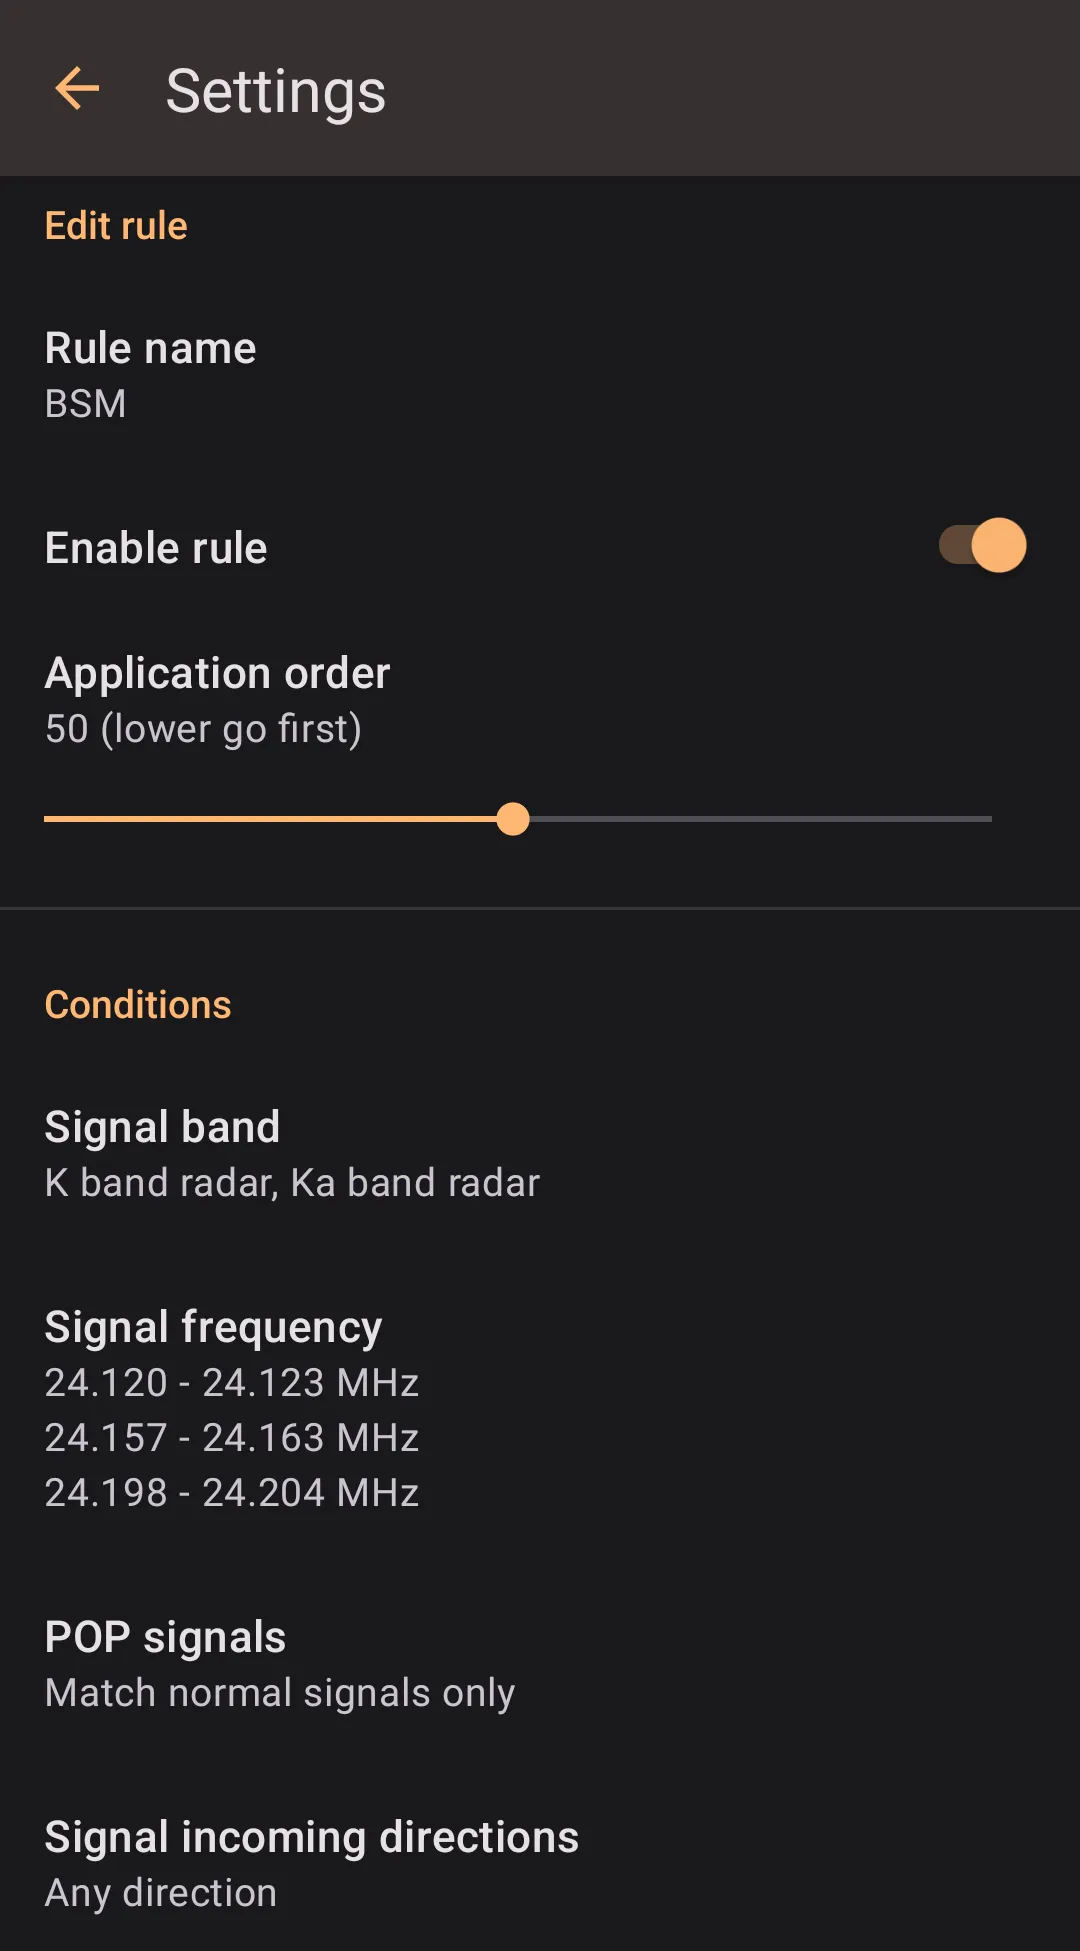
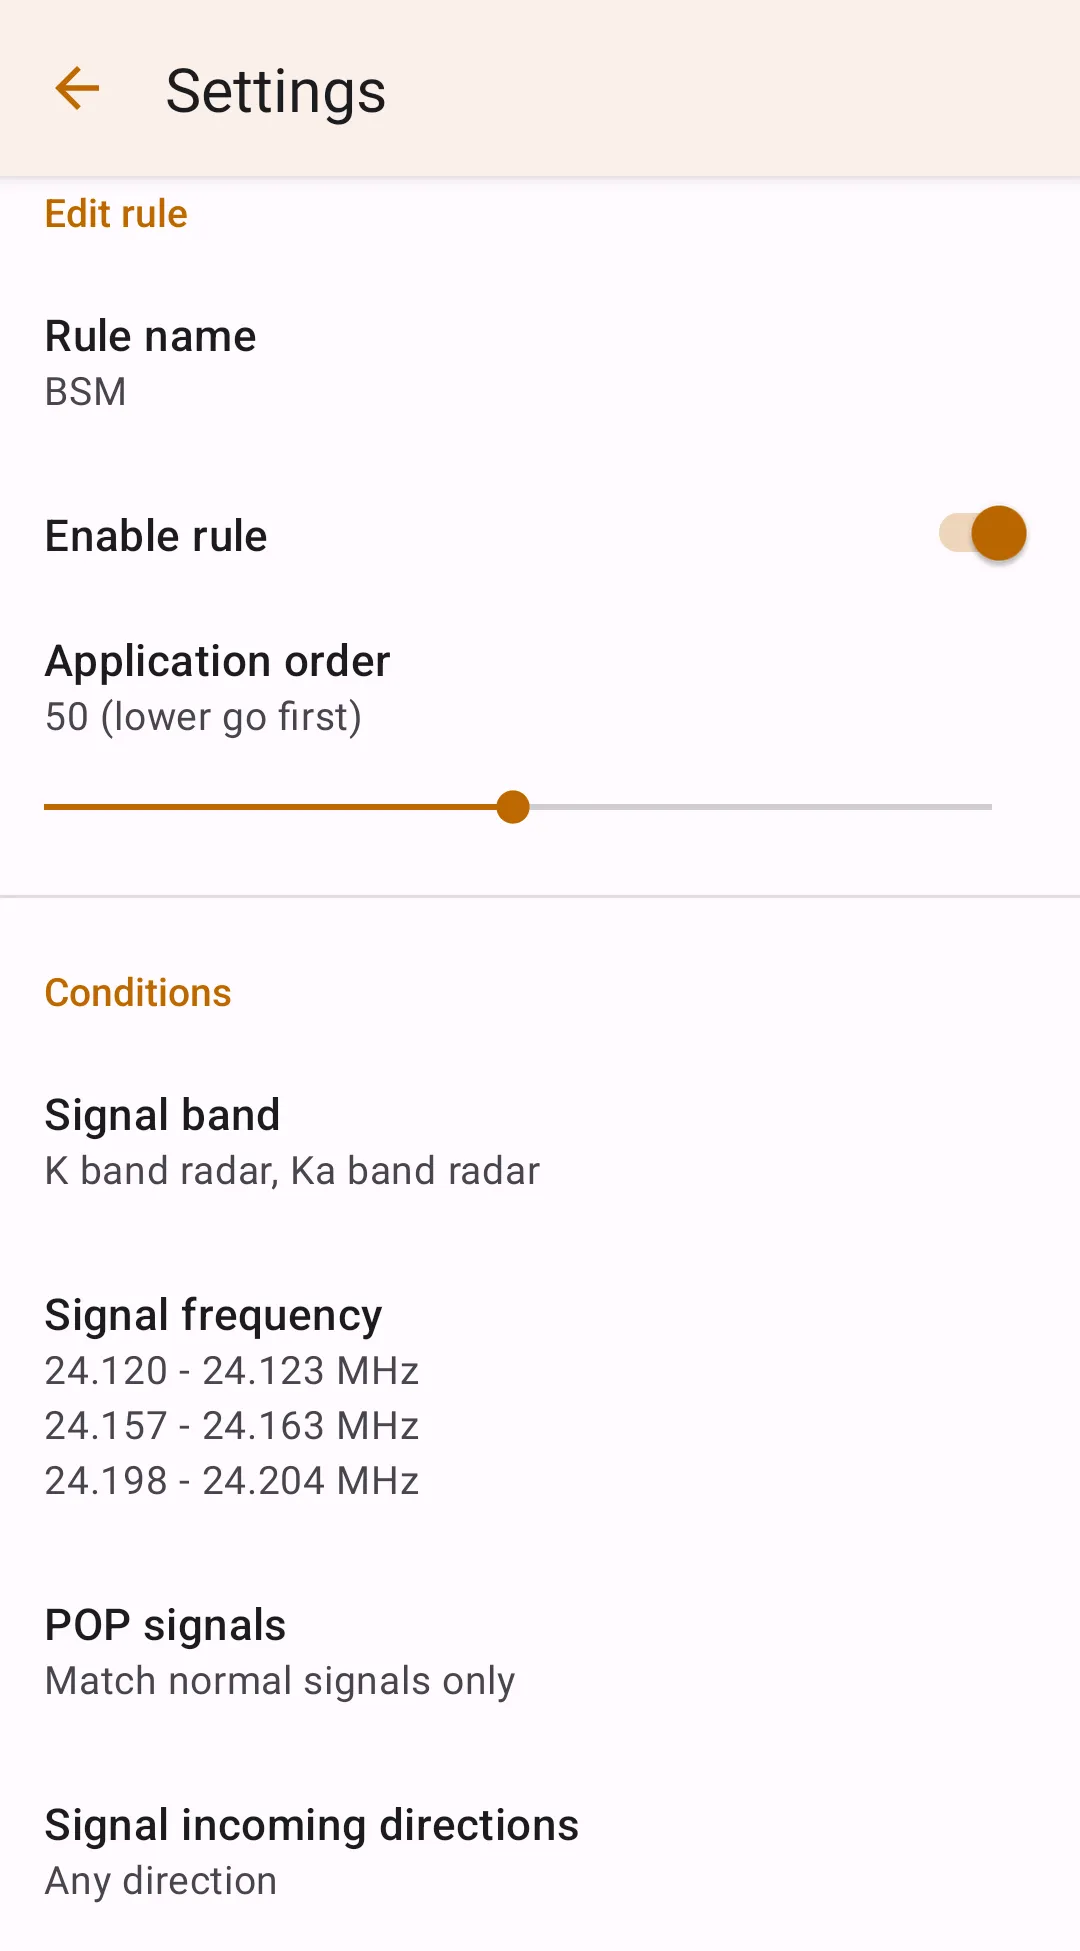
Basic Info
There are three preferences in the basic info section.
- Rule name – this is for the rule identification. A rule name may be announced together with the general voice announcement for the alert.
- Enable rule – this controls whether the rule is enabled. This preference is one of the only two settings packs may contain.
- Application order – this value controls the priority of that rule. If multiple rules which have some action set differently match (e.g., one tells to latch for 1 second, and another tells to latch for 3 seconds), the action from the rule with lower application order is used.
Conditions
The conditions section describes the filter to match against the alerts. You may specify several conditions; the rule is considered matched only if all the conditions match.
There are five conditions available to set
- Signal band – X, K, Ka, Laser, MRCD, MRCT, Gatso.
- Signal frequency (only available when non of Laser, MRCD, MRCT, Gatso bands selected) – allows specifying specific frequency range or multiple ranges.
- POP signals (only available when either K or Ka-band is selected) – allows choosing whether to match POP / non-POP signals.
- Signal incoming direction – front, rear, side, or unknown (for arrowless detectors, such as DS1 or R4).
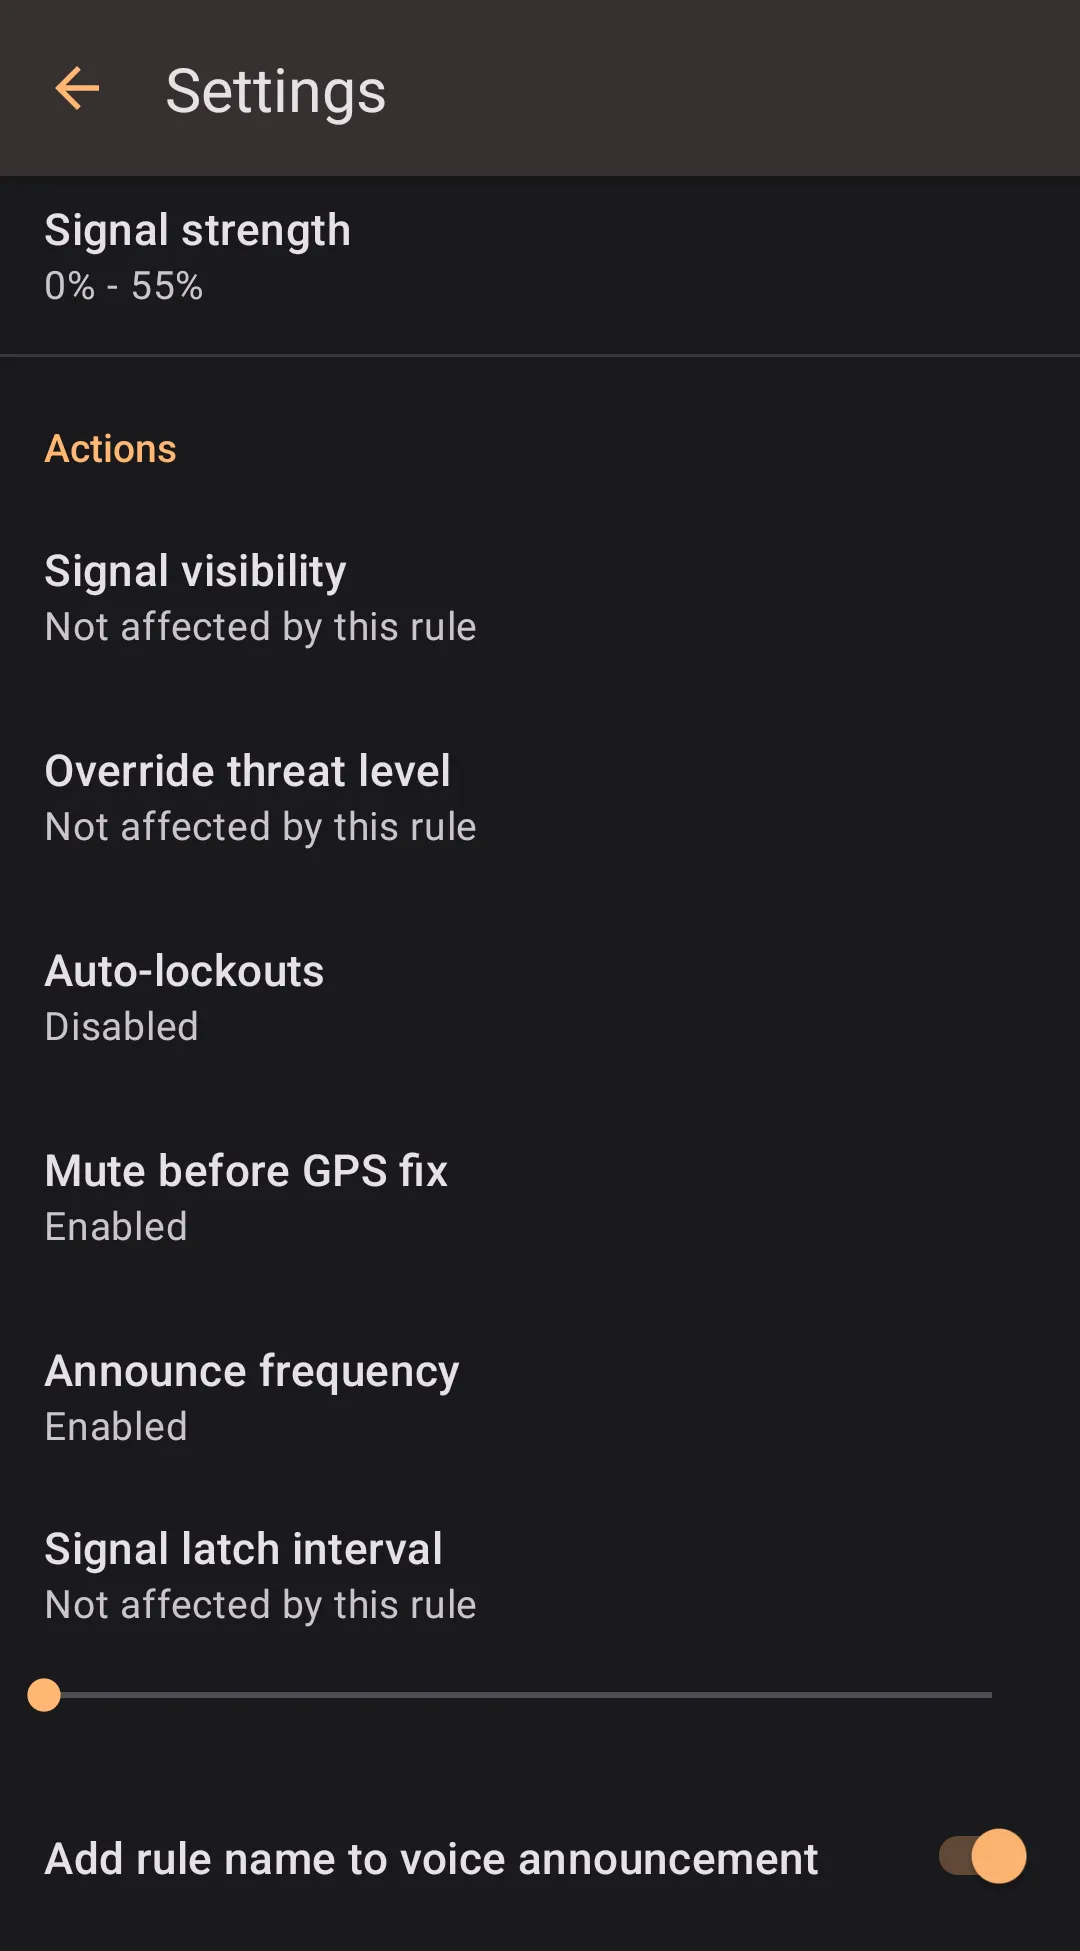
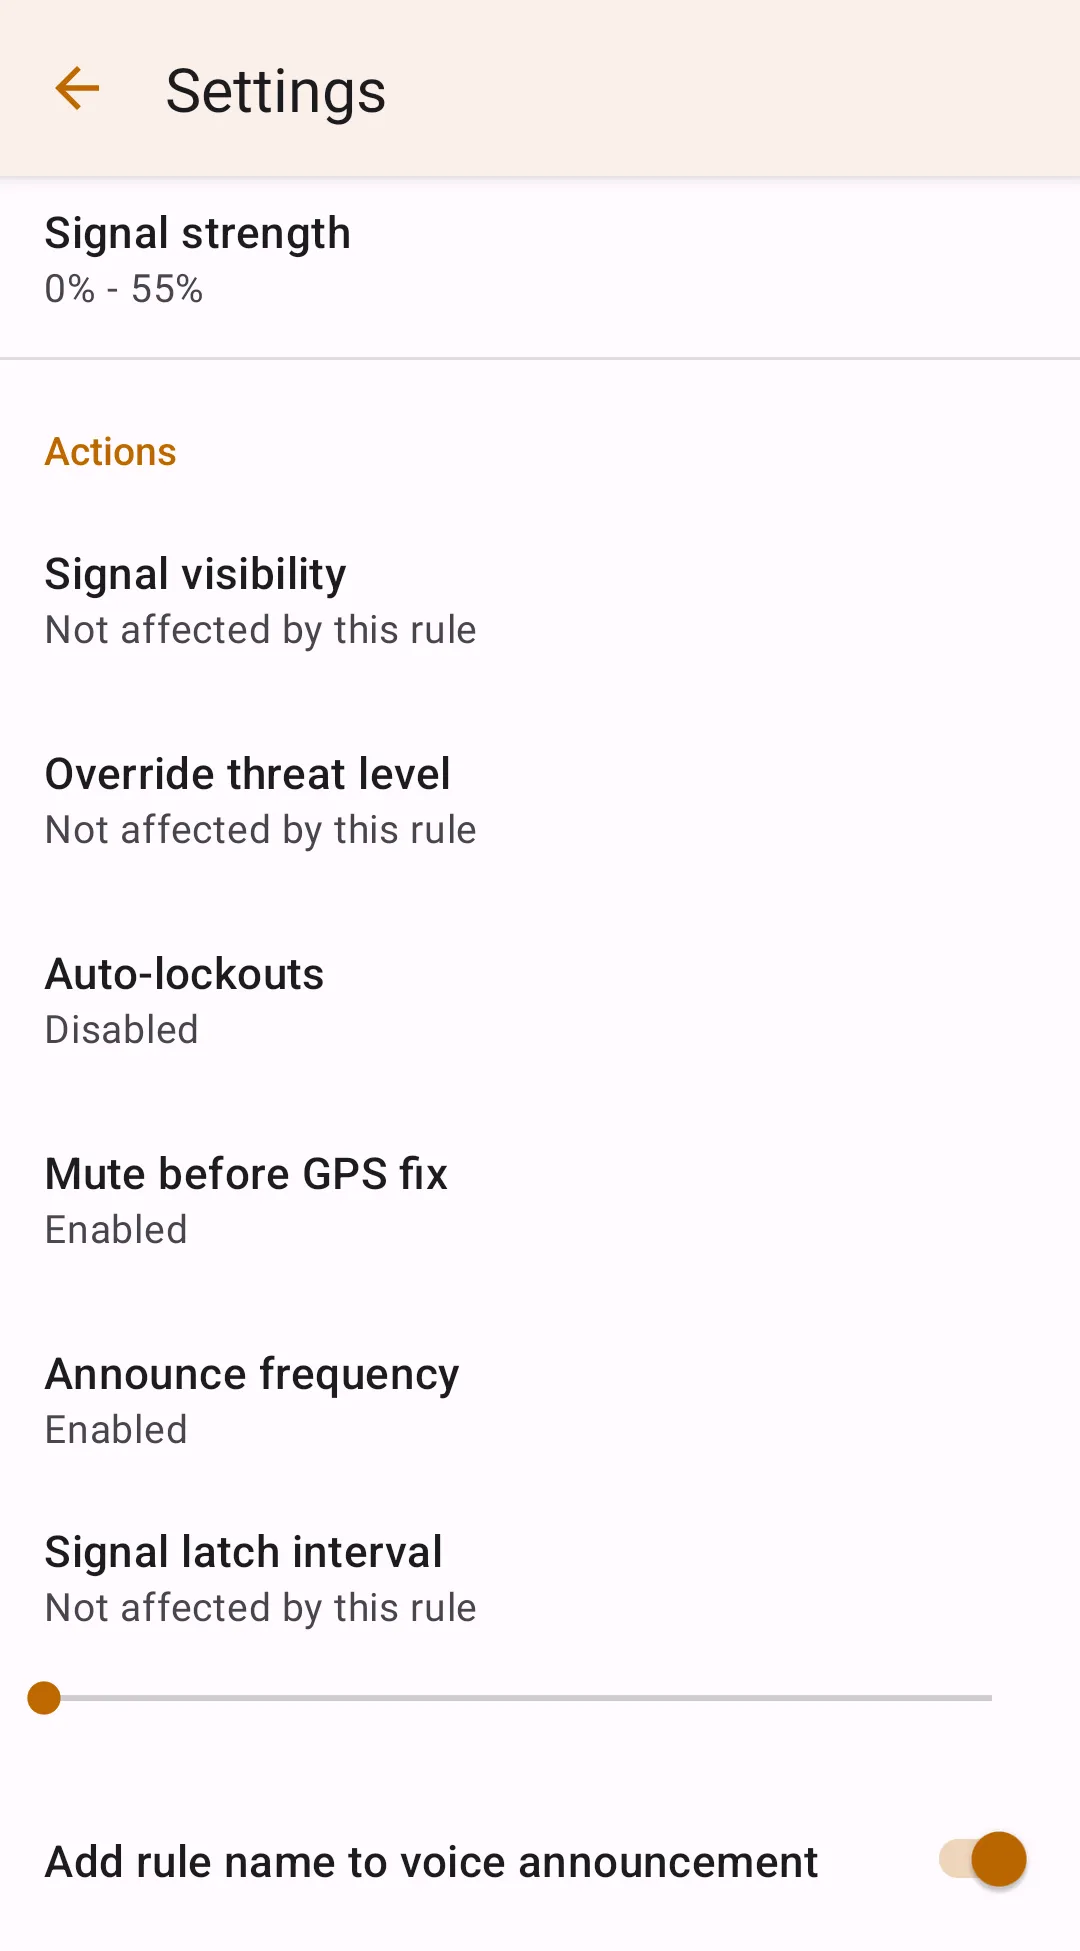
- Signal strength (only available when Laser is not selected) – allows matching signals by their strength.
Actions
Actions define what to do with the alert. All actions have an option named "Not affected by this rule," which is self-explanatory – the action won't apply to that alert.
There are many actions available.
- Signal visibility – sets whether alert on the signal, mute it (make the alert inactive), or discard and hide it completely.
- Override threat level (only available when signal visibility is not set to "Completely discard the signal") – sets whether the signal should be treated as a high threat or low threat.
- Auto-lockouts (only available when signal visibility is not set to "Completely discard the signal") – explicitly enable or disable auto-lockouts for the given signal, regardless of the threat level.
- Mute before GPS fix (only available when signal visibility is not set to "Completely discard the signal" or "Show signal as inactive, don't alert") – explicitly enables or disables muting before the first GPS fix for the given signal, regardless of the threat level
- Announce frequency (only available when signal visibility is not set to "Completely discard the signal" or "Show signal as inactive, don't alert") – explicitly enables or disables frequency announcement regardless of the corresponding preference in the "Operational settings."
- Signal latch interval (only available when signal visibility is not set to "Completely discard the signal") – overrides latch interval for the given signal.
- Add rule name to voice announcement (only available when signal visibility is not set to "Completely discard the signal" or "Show signal as inactive, don't alert").
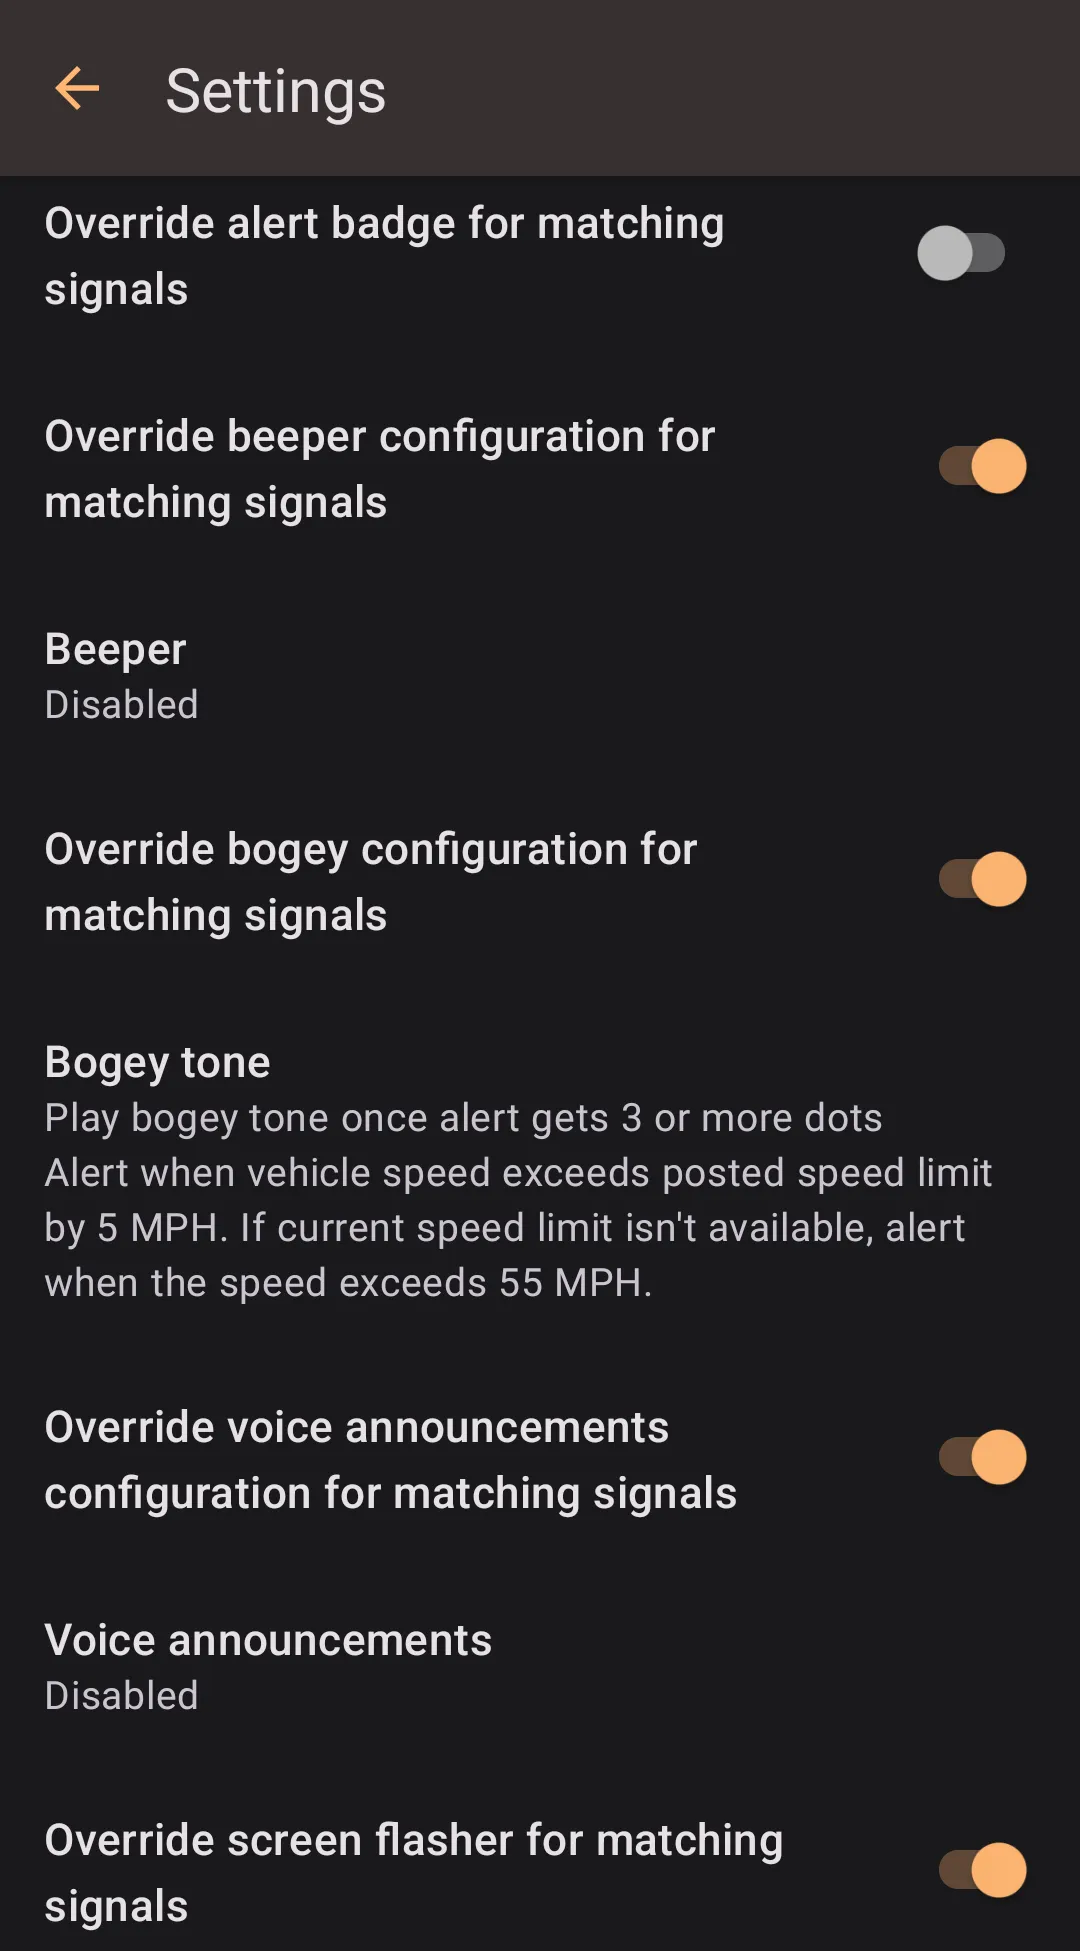
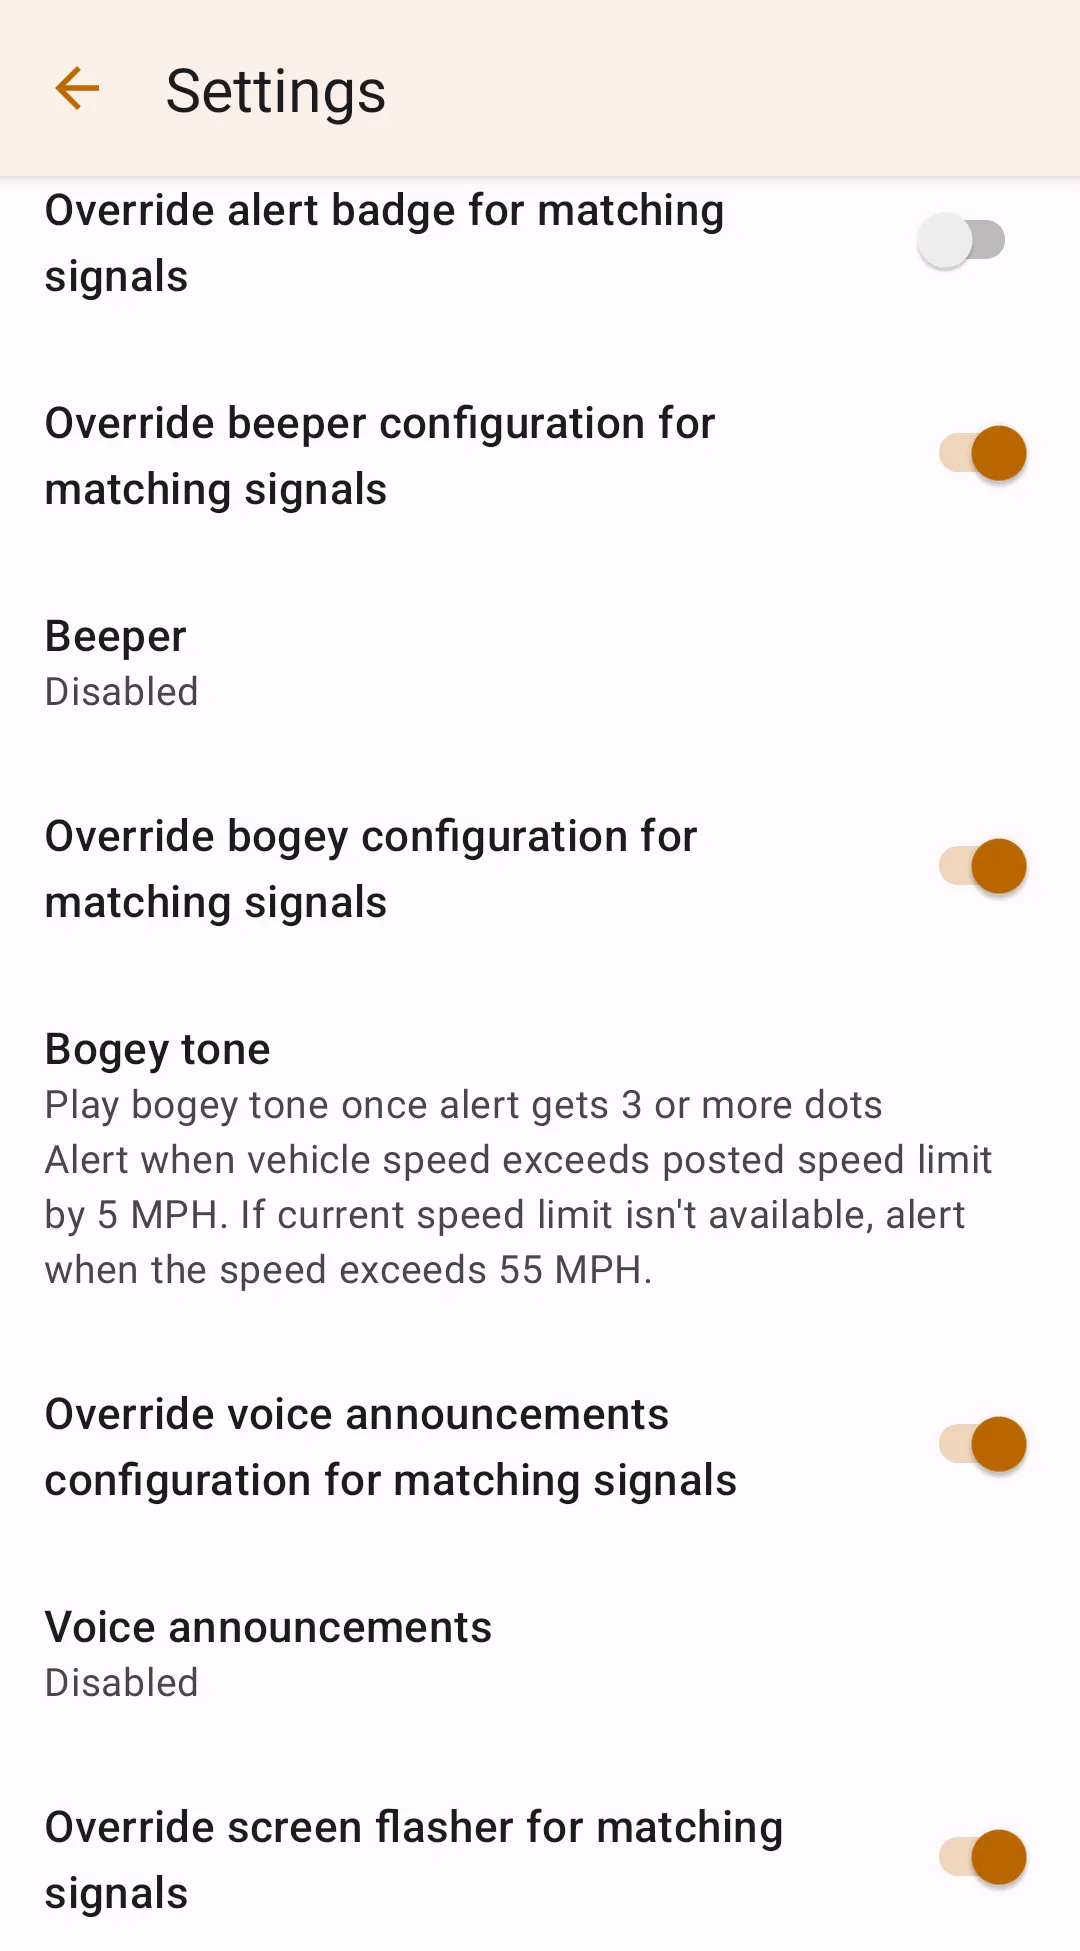
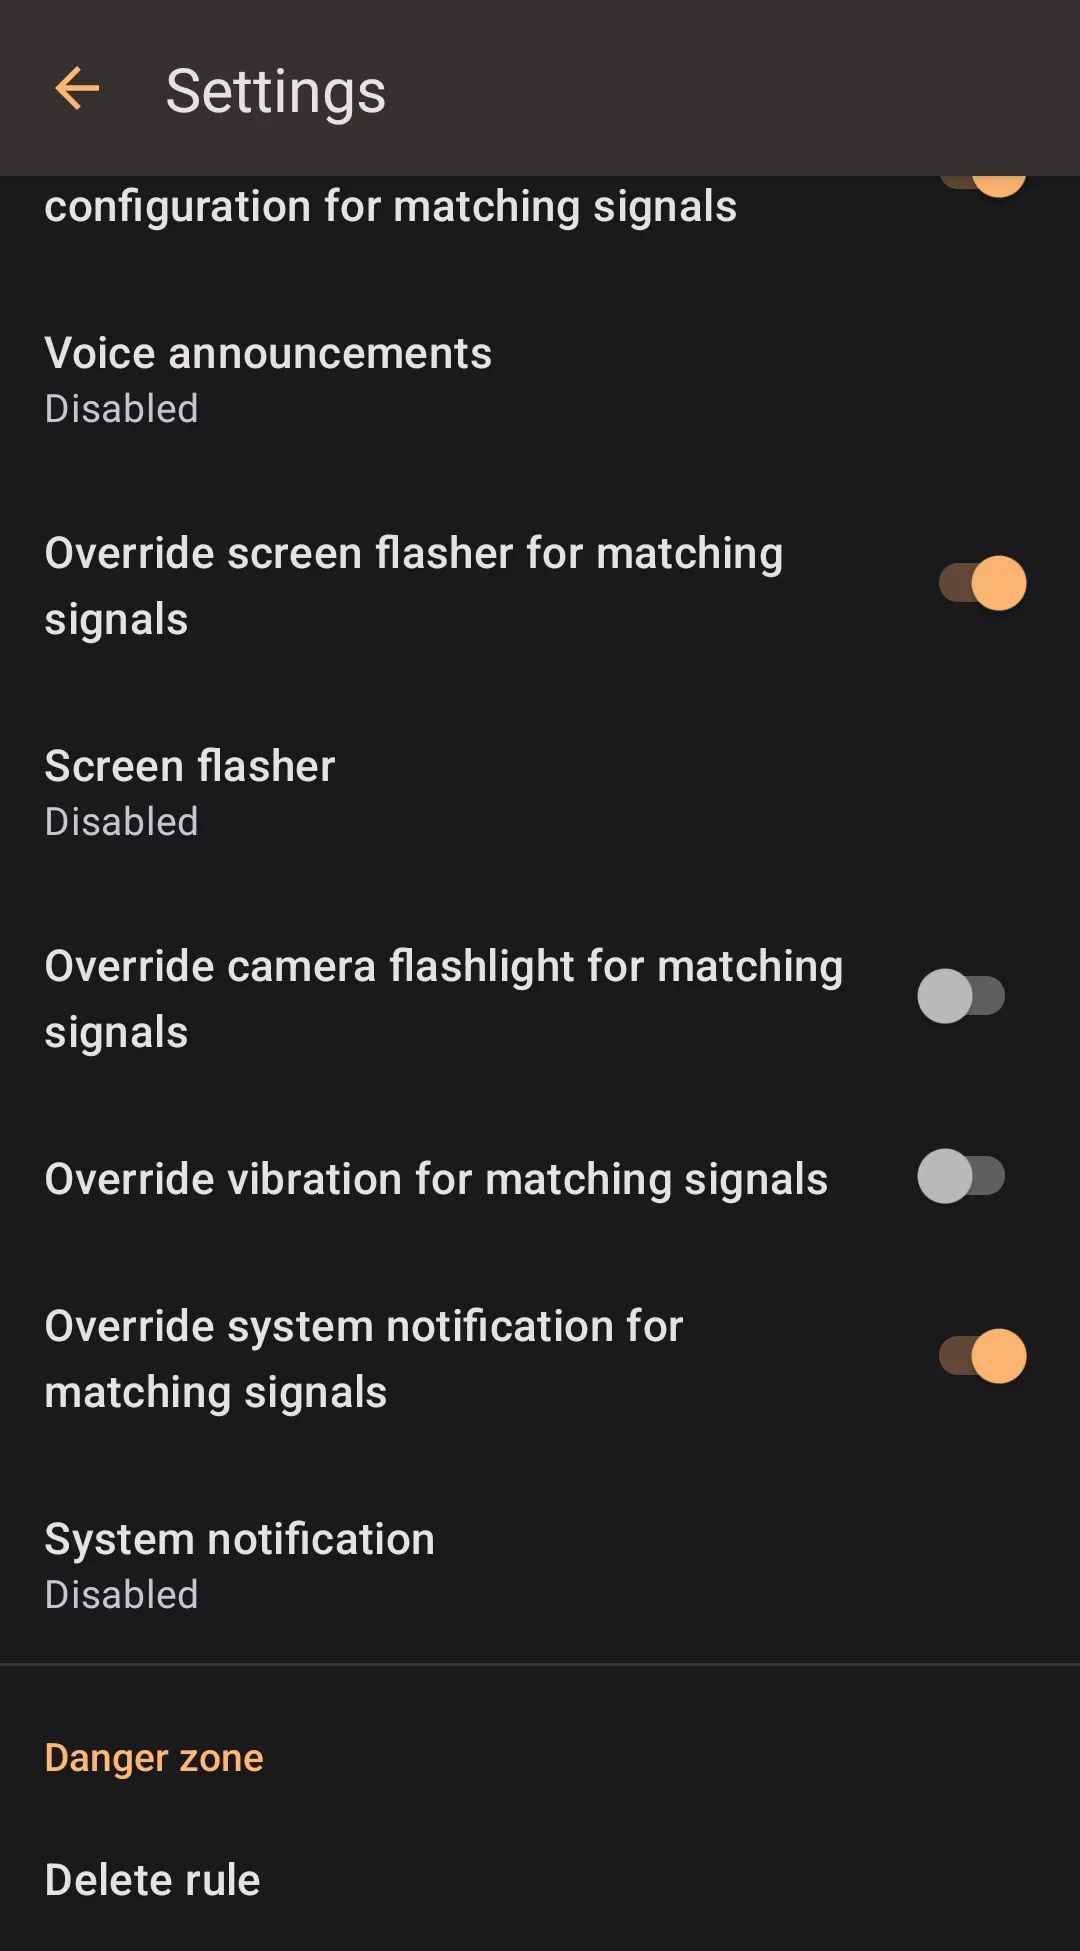
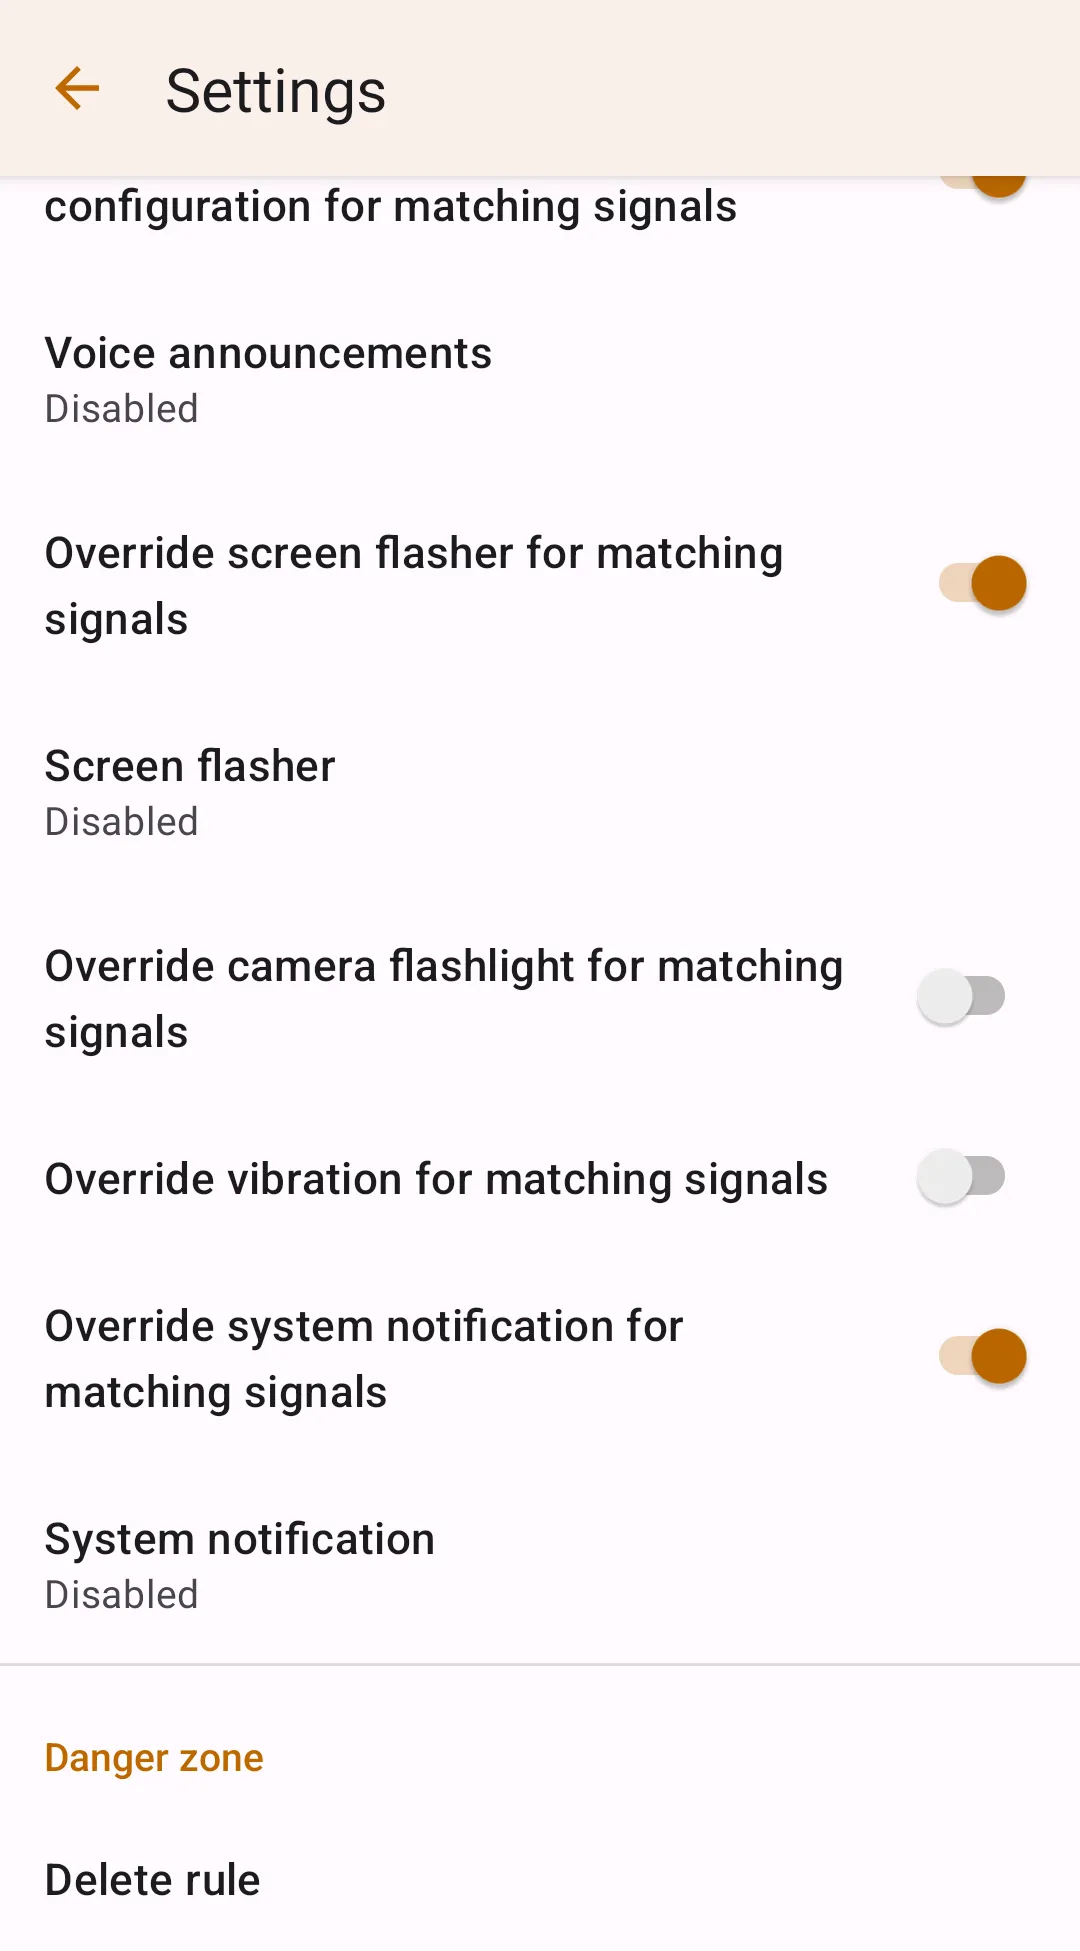
Notifications override
Notifications overrides are only available when signal visibility is not set to "Completely discard the signal" or "Show signal as inactive, don't alert". You can override beeper, bogey tone, voice announcement, screen flasher, camera flashlight, vibration, and system notifications for alerts matching the rule.
Examples
BSM Filtering
You can reduce sensitivity for several radar bands that often correspond to false alerts. Below is a possible configuration.
- Conditions
- Signal band: K band radar
- Signal frequency: Advanced mode, ranges:
24.120-24.124,24.157-24.163,24.197-24.204 - POP signals: Match normal signals only
- Signal incoming direction: Any direction
- Signal strength: 0% - 55%
- Actions
- Signal visibility: Show signal as inactive, don't alert
- Auto-lockouts: Disabled
- Signal latch interval: No latch
- all other actions set to "Not affected by this rule"
- all notifications overrides are disabled"
Reduce Rear Sensitivity For All Bands
- Conditions
- Signal band: All except laser
- POP signals: Match all signals
- Signal incoming direction: Rear
- Signal strength: 0% - 35%
- Actions
- Signal visibility: Show signal as inactive, don't alert
- Signal latch interval: No latch
- all other actions set to "Not affected by this rule"
- all notifications overrides are disabled"
Set A Different Tone For X-band
- Conditions
- Signal band: X band radar
- Signal incoming direction: Any direction
- Signal strength: 0% - 100%
- Actions
- Override beeper configuration for matching alerts: enable
- Once the switch above is enabled, you may set the desired beeper for alerts matching this rule
- all other actions set to "Not affected by this rule"